 |
Color 1 |
 |
Color 2 |
 |
Color 3 |
 |
Color 4 |
|
Here's Day 5 in the Twelve Days of
Christmas Series! I thought you might like a simple one to finish this project off! :o) This
is an original pattern. Please abide by the
Terms and Conditions of use! :o) |
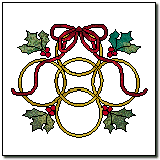
|
Click the image at left for
printable templates! |
|
** Preparing the Pieces and Sewing
the Block **
I suggest for this one, since there are once again
many pieces, that you print off several copies of the templates. Darken the outlines for
each piece you will need ...cut out ...add the 1/4" seam allowances. Note that the
bow is cut out all in one piece. I didn't list it as a needed
color, but you will
also need an 8 1/2-9" square of white background fabric!
Follow the directions below for order of placement
:o) |
|
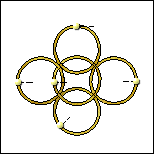 |
Centered on an 8 1/2"-9" square of white
background fabric, lay out the rings, first the four outer rings, with the center ring
atop them. Pin them in place and appliqué them to the background, using thread to
match the piece being sewn on... |
|
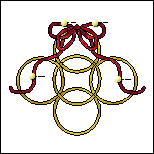 |
Next, pin on the bow and appliqué
it in place, using
thread to match ... |
|
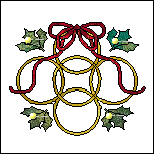 |
Now add the holly leaves, with the left and right
ones on first, and the center one on top. Appliqué them in place using thread to match... |
|
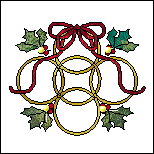 |
Lastly, pin on and appliqué three holly berries at
the stem end of each leaf group, using thread to match...AND,
YOU ARE DONE!! Now...how about
we turn these puppies into a QUILT? :o) Here's
one that Nancy made!
Linda's! |
|
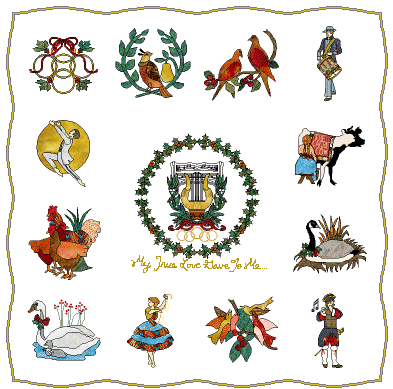 |
Well here she is ! WOAH, you say?
...how about that Center Medallion!?
And now the mystery is
revealed, and perhaps you see why this has taken me so long :o)
CLICK HERE to get to the Center
Medallion Pattern!
Here's
Eva's tablecloth! Linda's
Bev's!
Charlene's!
Regina's! |
|
Once you are done with
this quilt, you will have completed your first "Baltimore Album" type quilt
(some of you!)...and you should be VERY PROUD!! To make the quilt as shown above, you will
want to square off each of the Day's blocks to a consistent size...hopefully
8"!...and square off the center medallion to a 16" block, then add border strips
around the center medallion in the same white fabric you used as a background. Lay your
Day's blocks out beside it until you have them equally spaced. Cut sashing strips the width
needed ( plus your seam allowances) and sew these strips to your Day's blocks. Join the
four blocks in the top row. Join the two side pairs, and then sew each side pair to one
side of the center medallion. Sew the last four blocks into the bottom row. Edge the quilt
in a manner that pleases you!...and CHERISH this quilt! I am SO HAPPY for all of you!! |
|