|
Border Maple - Page 2 |
|
|
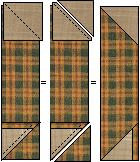
As we did with the shorter rectangles, place a Color 2 square on the top end a longer Color 1 rectangle. Sew the corner in the same manner. Place a stem unit on the bottom edge as shown at far left. The points of the triangle will extend about 1/4" over the edges. Sew on the slant edge, using a scant 1/4" seam. Cut off the excess seam allowance on the rectangle only, and press the triangle out to the corner. Make another unit like this with the angles of sewing reversed... |
|
|
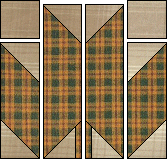
Now it's time to piece the block! Sew the remaining two Color 2 squares to the top of the two shorter rectangle units. Piece the block by sewing the vertical rows together!* Note...match your stem sections well here before you sew! |
|
|
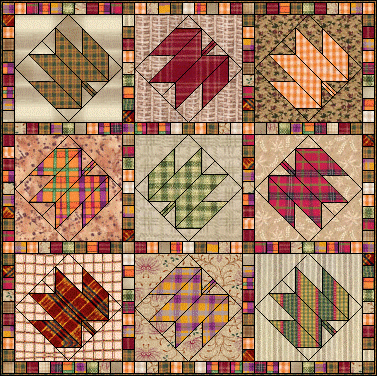
In straight sets, this would make a great border on a fall-ish quilt...or as shown here, by setting the blocks on point, it's a nice and simple little wall hanging!( 8-1/2" blocks when set on point with corners added- CLICK HERE for a primer on how to make setting triangles!) Happy Quilting Folks! Marcia :o) |
|
** Supplies List ** |
|
|
Color 1 needs: one 2" x 23" strip AND one 3/4" x 6" strip |
|
|
Color 2 needs: one 4" x 8" strip AND one 2-1/8" square |
|
|
|
||
|
Original Block |
http://www.quilterscache.com |