Learning to Quilt |
Lesson Three -- Practice Paper Piecing ! |
Let's first check our supply list! You will need: |
| * Fabric enough for your test block | * Foundation Paper to sew through | |
| * Scissors or Rotary Cutter and Mat | * An Iron |
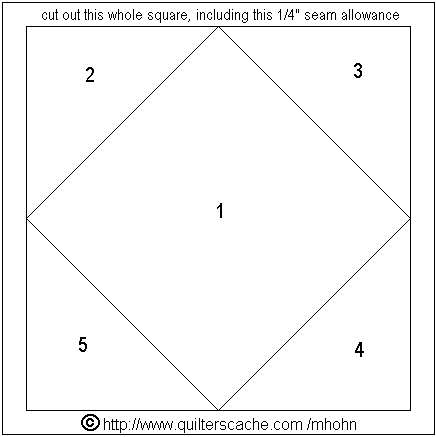
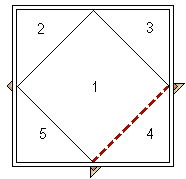
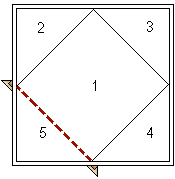
Now print off a copy of our Practice Base Block, which is a four inch square, plus 1/4" seam allowances. You can then either trace (accurately!) this block onto thin paper, or bring it to a photocopier and make several copies to practice on. Note that photocopiers often slightly distort the image though, so you will want to hold the original and the photocopy up to the light to see that your block is not too far off the mark! |
|
|
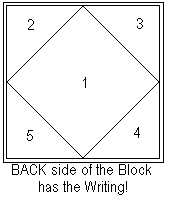
Set your sewing machine stitch length to a small stitch...about 12-18 per inch, and then change the needle to a size 90/14. This will aid in the perforation (and later removal) of the paper foundation. The side with the numbers and square will be the BACK side of your block! |
|
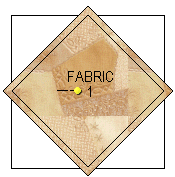
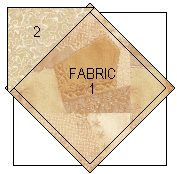
Now cut a piece of fabric large enough to cover the area labeled "1" with AT LEAST 1/4" extra all around. Center this fabric, right side up, on the RIGHT (unprinted) side of the foundation paper. Flip the paper over and hold up to a light to see that you have it covering the "1" space, plus at least 1/4" beyond on all sides. Pin in place... |
|
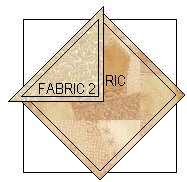
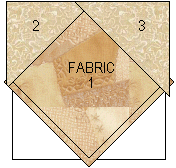
Now cut a piece of fabric large enough to cover the "2" space with AT LEAST 1/4" extra all around. Place this right sides together with Fabric 1 . Check in the light to see that it is going to cover the "2" space with 1/4" extra on all sides. Hold this piece in place, and... |
|
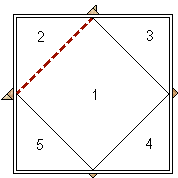
Flip the whole thing over. Now stitch on the line between section1 and section 2. Take a short backstitch at the beginning and end of this row of stitching. Trim the seam allowances back to just 1/4", being careful not to cut the paper off....now flip it all back over... |
|
Press out the "2" unit, using a dry iron and just gentle pressure... |
|
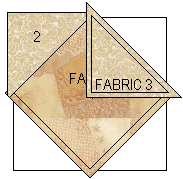
Now cut out a piece of fabric large enough to cover the "3" space with AT LEAST 1/4" extra all around. Lay this "3" fabric right sides together over the "1" fabric so that it will cover the "3" space with 1/4" extra all around. Check against the light before you sew! Hold this in place and flip the whole thing back over... |
|
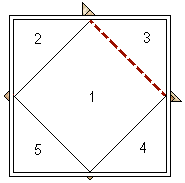
Stitch on the line between section 1 and section 3. Again, backstitch 1 stitch at the beginning and ending of this row of stitching. Trim the seam allowances...flip it all over again...:o) |
|
Now press out the "3" piece, again using gentle pressure, and a dry iron... |
|
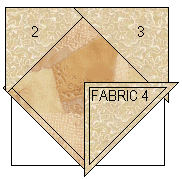
Now cut out a piece of fabric large enough to cover the "4" space with AT LEAST 1/4" extra all around. Lay this "4" fabric right sides together over the "1" fabric so that it will cover the "4" space with 1/4" extra all around. Check against the light before you sew! Hold this in place and flip the whole thing back over... |
|
Stitch on the line between section 1 and section 4. Again, backstitch 1 stitch at the beginning and ending of this row of stitching. Trim the seam allowances...flip it all over again... |
|
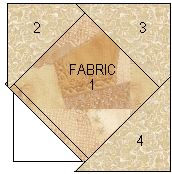
Now press out the "4" piece, again using gentle pressure, and a dry iron... |
|
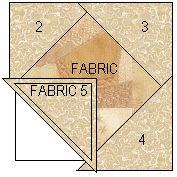
Now cut out a piece of fabric large enough to cover the "5" space with AT LEAST 1/4" extra all around. Lay this "5" fabric right sides together over the "1" fabric so that it will cover the "5" space with 1/4" extra all around. Check against the light before you sew! Hold this in place and flip the whole thing back over... |
|
Stitch on the line between section 1 and section 5. Again, backstitch 1 stitch at the beginning and ending of this row of stitching. Trim the seam allowances...flip it all over one more time... |
|
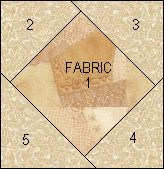
Now press out the "5" piece, again using gentle pressure, and a dry iron... AND THAT'S IT!! :O) |
Now make several more of these, and you will have paper piecing down pat! There are several great paper piecing sites available online, and I have a growing collection of free paper piecing patterns available on this site also! Happy Quilting Folks!! Marcia :o) |
|
|
http://www.quilterscache.com |
