|
Lesson
Four --Learn To Applique |
|
One of the most worthwhile
purchases you will ever make is a good book on quilting...one that
covers all the basics. There are MANY of these on the market! In the
mean time, I will cover some of the basics of Appliqué here!
Applique is
generally done with long thin needles, like a size 10 or 11 straw
needle. Threads
used will most commonly match the fabrics being sewn on. If
you are unable to find an exact color match of thread, the rule of
thumb is to go a shade lighter if you are appliquéing to a light
background, a shade darker if you are appliquéing to a dark
background. |
|
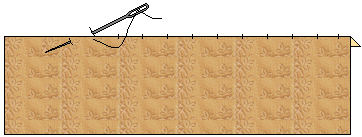 |
The most commonly used stitch,
for appliquéing your pieces to a background, is called the Blind
Stitch. I have it exaggerated here so you can see the
stitching, yours' should barely show! |
|
To do this stitch, knot the end
of a single thread and bring up your needle from underneath the
background fabric, barely piercing the fold edge of the piece you
are appliqueing on. Insert the needle back into the background
fabric, directly opposite where you came out and JUST over the edge
of the piece being sewn on. Bring the needle back up through the
fabrics, about 1/16th of an inch away from the previous stitch.
Continue taking tiny stitches all the way around the piece you are
sewing on. Bring thread to the back, and knot. |
|
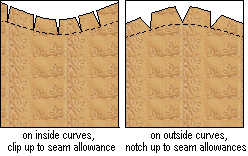 |
When working around inside
curves, you may find it helps to make clips up to, but not through,
the seam allowance. When working around outside curves, cut out
small notches of fabric to make the fabric turn under more
smoothly. |
|
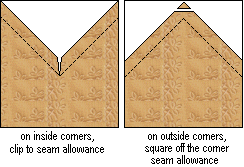 |
Before sewing past an inside
corner, clip the seam allowance to the seam line. Before sewing past
an outside corner, clip off the excess seam allowance at the tip. |
|
**
Getting The Pieces Ready ** |
|
I prefer the Freezer Paper Shiny
Side Down method...so that's what I will show here! I do a slightly
different version of this method personally, which I will show below
this, the more common version. There are
COUNTLESS methods of preparing your pieces to appliqué however...so
you will need to experiment, and find your favorite! |
|
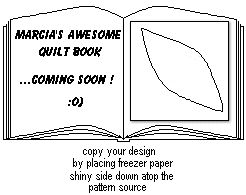 |
Start by placing a sheet of
freezer paper shiny side down over the pattern of your choice. Using
a pencil copy the design onto the freezer paper. Cut out the design
you just drew. |
|
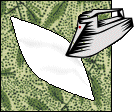 |
Place the freezer paper template
shiny side down on the WRONG side of your fabric. With a hot (dry)
iron, Press the freezer paper shape. It will adhere to the
fabric. |
|
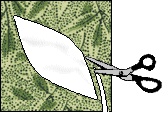 |
Using scissors, cut around the
shape, leaving a 1/8" - 3/16" seam allowance all the way
around. |
|
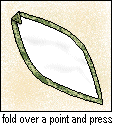 |
Starting at the point,
fold the seam allowance straight down over the paper template
and press. Snip off the tip of the point to reduce bulk in that
seam. |
|
|
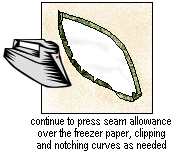
Work your way around the piece,
folding and pressing the seam allowance over the edge of the paper
template. You may need to clip (inside curves) or notch (outside
curves) the seam allowance as you go to make it lie nice and flat.
WARNING! Be careful you don't burn your fingers doing this! Remove
the freezer paper. Applique the piece to the background, using the blind stitch.... |
|
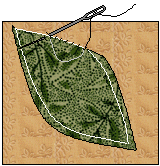 |
To do the Needle turn method,
which eliminates the pressing under of seams ahead of time...Begin sewing, using the blind
stitch, and using the tip of your needle to turn under the seam
allowance ahead of you as you go. |
|
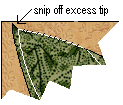 |
When you get to within one
stitch from an outside point, snip off the excess fabric at the tip. |
|
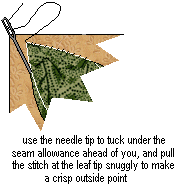 |
Then use your needle to turn
under the seam allowance going down the next side. Take a stitch at
the very outside point, and pull this stitch snug, to make a nice
"pointy" point! |
|
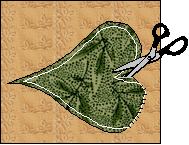 |
This next leaf has an INSIDE
point. Begin sewing, again using the needle tip to turn under the
seam allowance ahead of you. Before you get to the inside point, use
small scissors to clip to the seam line. Use your needle to turn
under the seam allowance past the inside point. |
|
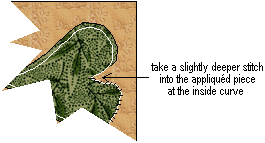 |
Take a slightly deeper stitch at
the very inside point, to keep this from raveling, or if needed take
several stitches very close together. |
|
**
Reverse Appliqueing ** |
|
Reverse applique is much the
same as appliqué, except that you are working with two or more
layers of fabric, cutting away top layers to reveal fabrics beneath. |
|
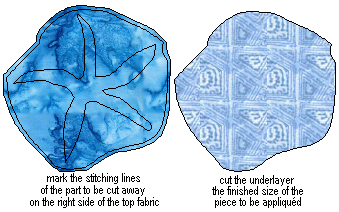 |
Reverse Applique isn't scary!
To do this, cut out your top piece, adding 1/8"- 3/16"
seam allowance. Cut out the piece to be revealed from underneath the FINISHED
size...(.the same size, but without adding seam allowances!) Now
transfer the design area that you will be cutting away onto the
RIGHT side of the top fabric. |
|
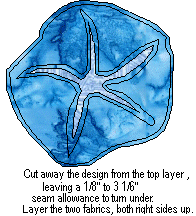 |
Cut away
the inside of the design area from the top piece of fabric, leaving 1/8"
to 3/16" seam allowance to turn under. Now layer the fabrics.
Be sure both fabrics are
FACE UP. |
|
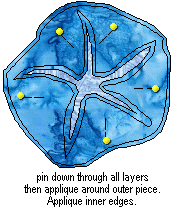 |
Pin both layers to your
background, and appliqué around the outside layer first. Then begin
appliqueing the inside seams, remembering to clip and/or notch seam
allowance as needed to keep it lying flat. Clip to seam allowance at
inner points. Snip off excess at outer points. |
|
**
Now the Method I Use ** |
|
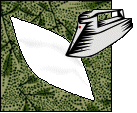 |
Press the freezer paper shape,
shiny side down on the RIGHT side of the fabric. |
|
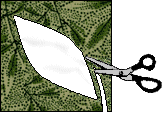 |
Using scissors, cut around the
shape, leaving a 1/8" - 3/16" seam allowance all the way
around. |
|
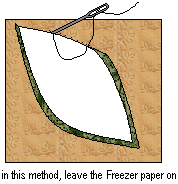 |
...but...I leave the freezer
paper ON as I work, needle turning the fabric ahead of me as I go,
turning under the edges so that they just align with the paper
shape. NOTE* I am working right under the very edge of the paper
into the fabric I am ...NOT through the paper... |
|
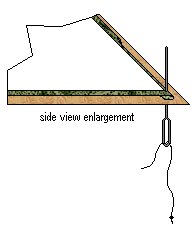 |
Here's a side view enlargement
of what I mean, showing the background fabric, the green piece I am appliqueing on, and the paper piece on top. The paper would
actually come out right even with the part I am sewing and I would
be working between the background and the paper. If need be, you can
pin on your paper piece if it starts to come off in the piecing
process. |
|


