|

|
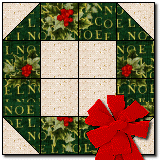
Kids Can Quilt!! |
|
1.Cut your pieces according
to the following: |
 |
|
|
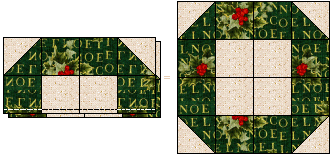
From a Christmas Fabric, cut one strip
that measures 4-1/2" by 36"...From your background fabric, cut a strip that
measures 4-1/2" by 18". Mark lightly on the BACK every 4-1/2", and then cut to
make eight Christmas Fabric 4-1/2" squares, and four Background Fabric
4-1/2"squares. |
|
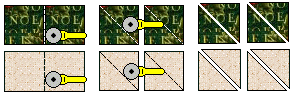
Next...also from the Christmas fabric...
cut a strip that measures 4-7/8" by 9-3/4", and one of the same size from the
Background fabric. Mark on the BACK every 4-7/8", and cut each of these into two 4-7/8" squares each. Now cut each one of these 4-7/8" squares from corner to
corner to make four triangles of each color. |
|
Now we will start sewing them together! |
|
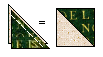 |
First take one of the Christmas Fabric
triangles, and one of the Background Fabric triangles, place them with right sides of the
fabrics together. Pin. Sew them together along one long side ...having your seam width be
1/4 inch. Iron the seam allowances towards the darker fabric. Do this with all the
triangles, until you have four of these two colored squares. |
|
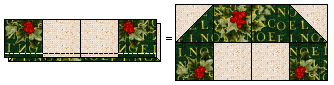
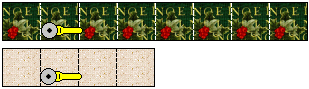
To make the first and last row lay down
a two colored square with the Background fabric half at the top left ...lay a Christmas
Fabric 4-1/2" square on top, with the right sides of the two squares together. Sew
together on the right side, using a 1/4" seam. Iron the seam allowance towards the
Christmas Fabric square. Next add another Christmas fabric square, then add another two
colored square this time with the Background fabric half at the top right, always adding
the new square on the right, and always ironing the seam allowance towards the newly added
square. |
|
To make the second and third rows lay
down a Christmas Fabric square, and atop that lay a Background fabric square... having the
right sides of the fabrics together. Sew, using a 1/4" seam, along the right
side. Iron the seam allowances of this row towards the other direction. Add another
Background fabric square, and then another Christmas Fabric square. Make two rows like
this! |
|
Now sew the top row to the second
row...by laying the top row flat, right side up. Put the second row atop that, with its
right side DOWN. Pin. Sew, using a 1/4" seam, along the bottom. Iron the seam towards
the top row. |
|
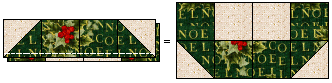
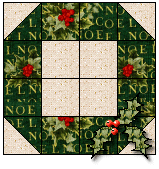
Next sew the other middle row to the
bottom row by laying the other middle row flat with it's right side UP...and laying the
bottom row atop that with its right side DOWN. Pin. Make sure this bottom row is flipped
so that the BOTTOM of the wreath is at the TOP of your two row pile, as shown in the
picture above. Sew these together along the bottom using a 1/4" seam. Iron the seam
allowance towards the bottom row. |
|
Next sew together the top half of the
block and the bottom half of the block, by laying them right sides together...pinning
them...and sewing along the bottom. Again...using a 1/4" seam. Iron the seam towards
the bottom of the block. |
|
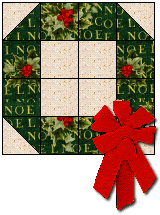 |
Now you can decorate your block by
hand sewing on either a purchased bow...or a ribbon bow you make yourself...or even some
cut out Holly leaf Shapes with red buttons added for berries! |
 |
|
A note to parents or
teachers. For very young sewers it really does help to do the strip cutting FOR them, and
place each rows' pieces in individual baggies, labeled "row one" row two"
etc. |
|
 Oct 1999 Marcia Hohn Oct 1999 Marcia Hohn |
|