|

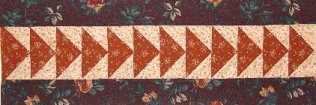
There are three methods to piece Flying Geese units, and I will briefly explain all three here. In general, a flying geese unit is always twice as wide as it is tall. Here's one that Karlene made! ( As a Border!) |
| First, the TRADITIONAL METHOD : good for making several Flying Geese units as it makes four at a time. |
 |
To make a Flying Geese unit following the Traditional Piecing method, you need one SQUARE, the size of the finished width you desire it to be + 1 1/4", AND two TRIANGLES cut from squares that are the height of the finished unit you want plus 7/8". Cut the large square on the diagonal twice. This will give you four geese. Then sew a sky triangle to each of the top angled sides, using scant 1/4" seams. You will get four Flying geese units per large square. EXAMPLE: to get four 2" x 4" finished flying geese units, you would use a 5 1/4" geese square cut twice diagonally, and four 2 7/8" sky triangles, cut diagonally once each. |
| Second, SPEED PIECING METHOD A : good for piecing just a few units, as it makes just one at a time. |
|
To make a Flying Geese unit following Speed Piecing Method A you need one RECTANGLE the length you want the geese unit to be plus 1/2" times the width you want it to be plus 1/2", AND two SQUARES that measure half the desired length plus 1/2". Place a small square atop the left corner of the rectangle, right sides together. On the back of the small square, draw a diagonal line. Sew on this diagonal line. Trim off the excess seam allowance, and press the remainder towards the outer triangle. Repeat with another square on the opposite end. So that you aren't wasting any fabric, sew the snippets that you are cutting off in pairs, and you will have some neat small half squares to use in another project! EXAMPLE: to get a 2" x 4" finished Flying Geese unit you would use a 2 1/2" x 4 1/2" geese rectangle, and two 2 1/2" squares. |
| Lastly, SPEED PIECING METHOD B: good for making several Flying Geese units as it makes four at a time. |
|
To make a Flying Geese unit following the Speed Piecing Method B, you need one SQUARE, the size of the finished width you desire the flying geese unit to be + 1 1/4", and four SQUARES that are the height of the finished unit you want plus 7/8". |
|
Lay two of the smaller squares lined up with the top left and lower right corners, right sides together atop the large square. They will overlap a tad. Draw diagonal lines on the backs of the smaller squares. Sew a scant 1/4" on each side of the marked diagonal. Cut apart on the marked diagonal. |
|
Press out the seams on each of the two units made in the previous step. Line up another small square against the larger triangle, again right sides together. Draw a diagonal line on the back of that small square, and again sew a scant 1/4" on each side of the marked line. Cut apart on the marked line again. Repeat this with the remaining two pieces. EXAMPLE: to get a 2" x 4" finished Flying Geese unit, you would use a 5 1/4" geese square and four 2 7/8" sky squares. |
|
I also have some paper piecing templates for rows of Flying Geese...HERE |
|
|
|
|

pattern from http://www.quilterscache.com |