|
|
|
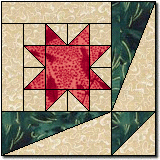
This makes a 14" block and is a combination of regular piecing, paper piecing and regular template piecing! Please abide by the Terms and Conditions of use! :o) |
|
|
** Preparing the Pieces and Sewing the Block ** |
|
|
From Color 3, cut one 2-1/2" x 10-1/2" strip, one 2-1/2" x 8-1/2" strip, and one 2-1/2" 10" strip. Mark and cut the 2-1/2" x 10" strip into four 2-1/2" squares... |
|
|
Next, using the triangle template provided, cut one triangle each from a Color 2 and Color 3 5 "square... |
|
|
Then speed piece the half squares by stacking the Color 1 and Color 3 2-7/8" x 11-1/2" strips right sides together and all edges aligned. On the back of the top strip lightly mark the 2-7/8" square lines, then mark in the diagonals as shown at left. Sew a SCANT 1/4" above and below the marked diagonals , pivoting at the square lines. Cut apart on the marked diagonals and on the square lines. this will give you eight half squares. Press seams towards the darker fabric. Trim to 2-1/2" if needed... |
|
|
Using the Color 3 2-1/2" squares, the half squares we just made, and the Color 1 4-1/2" square, make the center unit as shown at left. Alternate pressing directions when sewing rows together to keep seams flat... |
 |
Now sew the Color 3 2-1/2" x 8-1/2" strip to the left side of the center unit, using as always a SCANT 1/4" seam. Press seam towards the outer strip. Sew the Color 3 2-1/2" x 10-1/2" strip to the top. Press seam towards the outer strip... |
| |
|
Now, because this paper piecing template measures 4-1/2" x 10-1/2", I couldn't get it to print out fully on one page, so I divided it. You will need to tape it together as shown on the template. Do NOT tape in over the sewing lines or you won't be able to properly remove the paper there! Refer to the Practice Paper Piecing Page if you need information on how to do this method of piecing! You need to make TWO of these rectangle units--ONE IN REVERSE... now...on to Page 2! |
|
|
|
Traditional Block |
pattern from http://www.quilterscache.com |


